How to treat a home studio on any budget

Consult your project with our experts and receive a clear list of recommendations specific to your space. You'll move forward with total confidence, knowing your acoustic solution is perfectly tailored to your design and sound goals.
Service Highlights:
Personalized advice from acoustic professionals
See the acoustic treatment applied directly within your own room
Receive a clear list of recommended acoustic solutions
Three following examples of the room setup will get you the most out of your home studio. This article shows you how to progress with the acoustic treatment from creating a simple RFZ (reflection-free zone) to treating the room as a whole.
Getting the room acoustics right takes time and money, so take these examples as steps that you can take gradually to upgrade your studio over time. If your room doesn’t look like the rectangle we are showing, don’t worry, these basic principles apply almost to all the rooms we see at home. If you have an alcove, lower ceiling, or anything else that deviates from these ideal conditions, let us know and we can think of a solution just for you.
Set up your listening position
This can’t be stressed enough, so we always mention it first. The first step of a proper acoustic solution is to set up the speakers and listening position. If you skip this step, probably nothing will help you to get a good sound. Check out our guide where you learn all the details.
Face the short wall. If possible, use the 38 % rule and avoid placing your listening position or speakers on 25 % or 50 % of the length of the room.
Stay in the center from sidewalls. Distance from speakers to sidewalls is equidistant.
Form an equilateral triangle between speakers and the listening position.
Decouple speakers from the table. Place them on stands.
Be prepared to move your position or speakers slightly forward or backward if needed.

Form a triangle with your speakers and don’t put the speakers or your listening position at 25 % or 50 % of the length of the room.
1. Basic treatment
Create RFZ - reflection-free zone

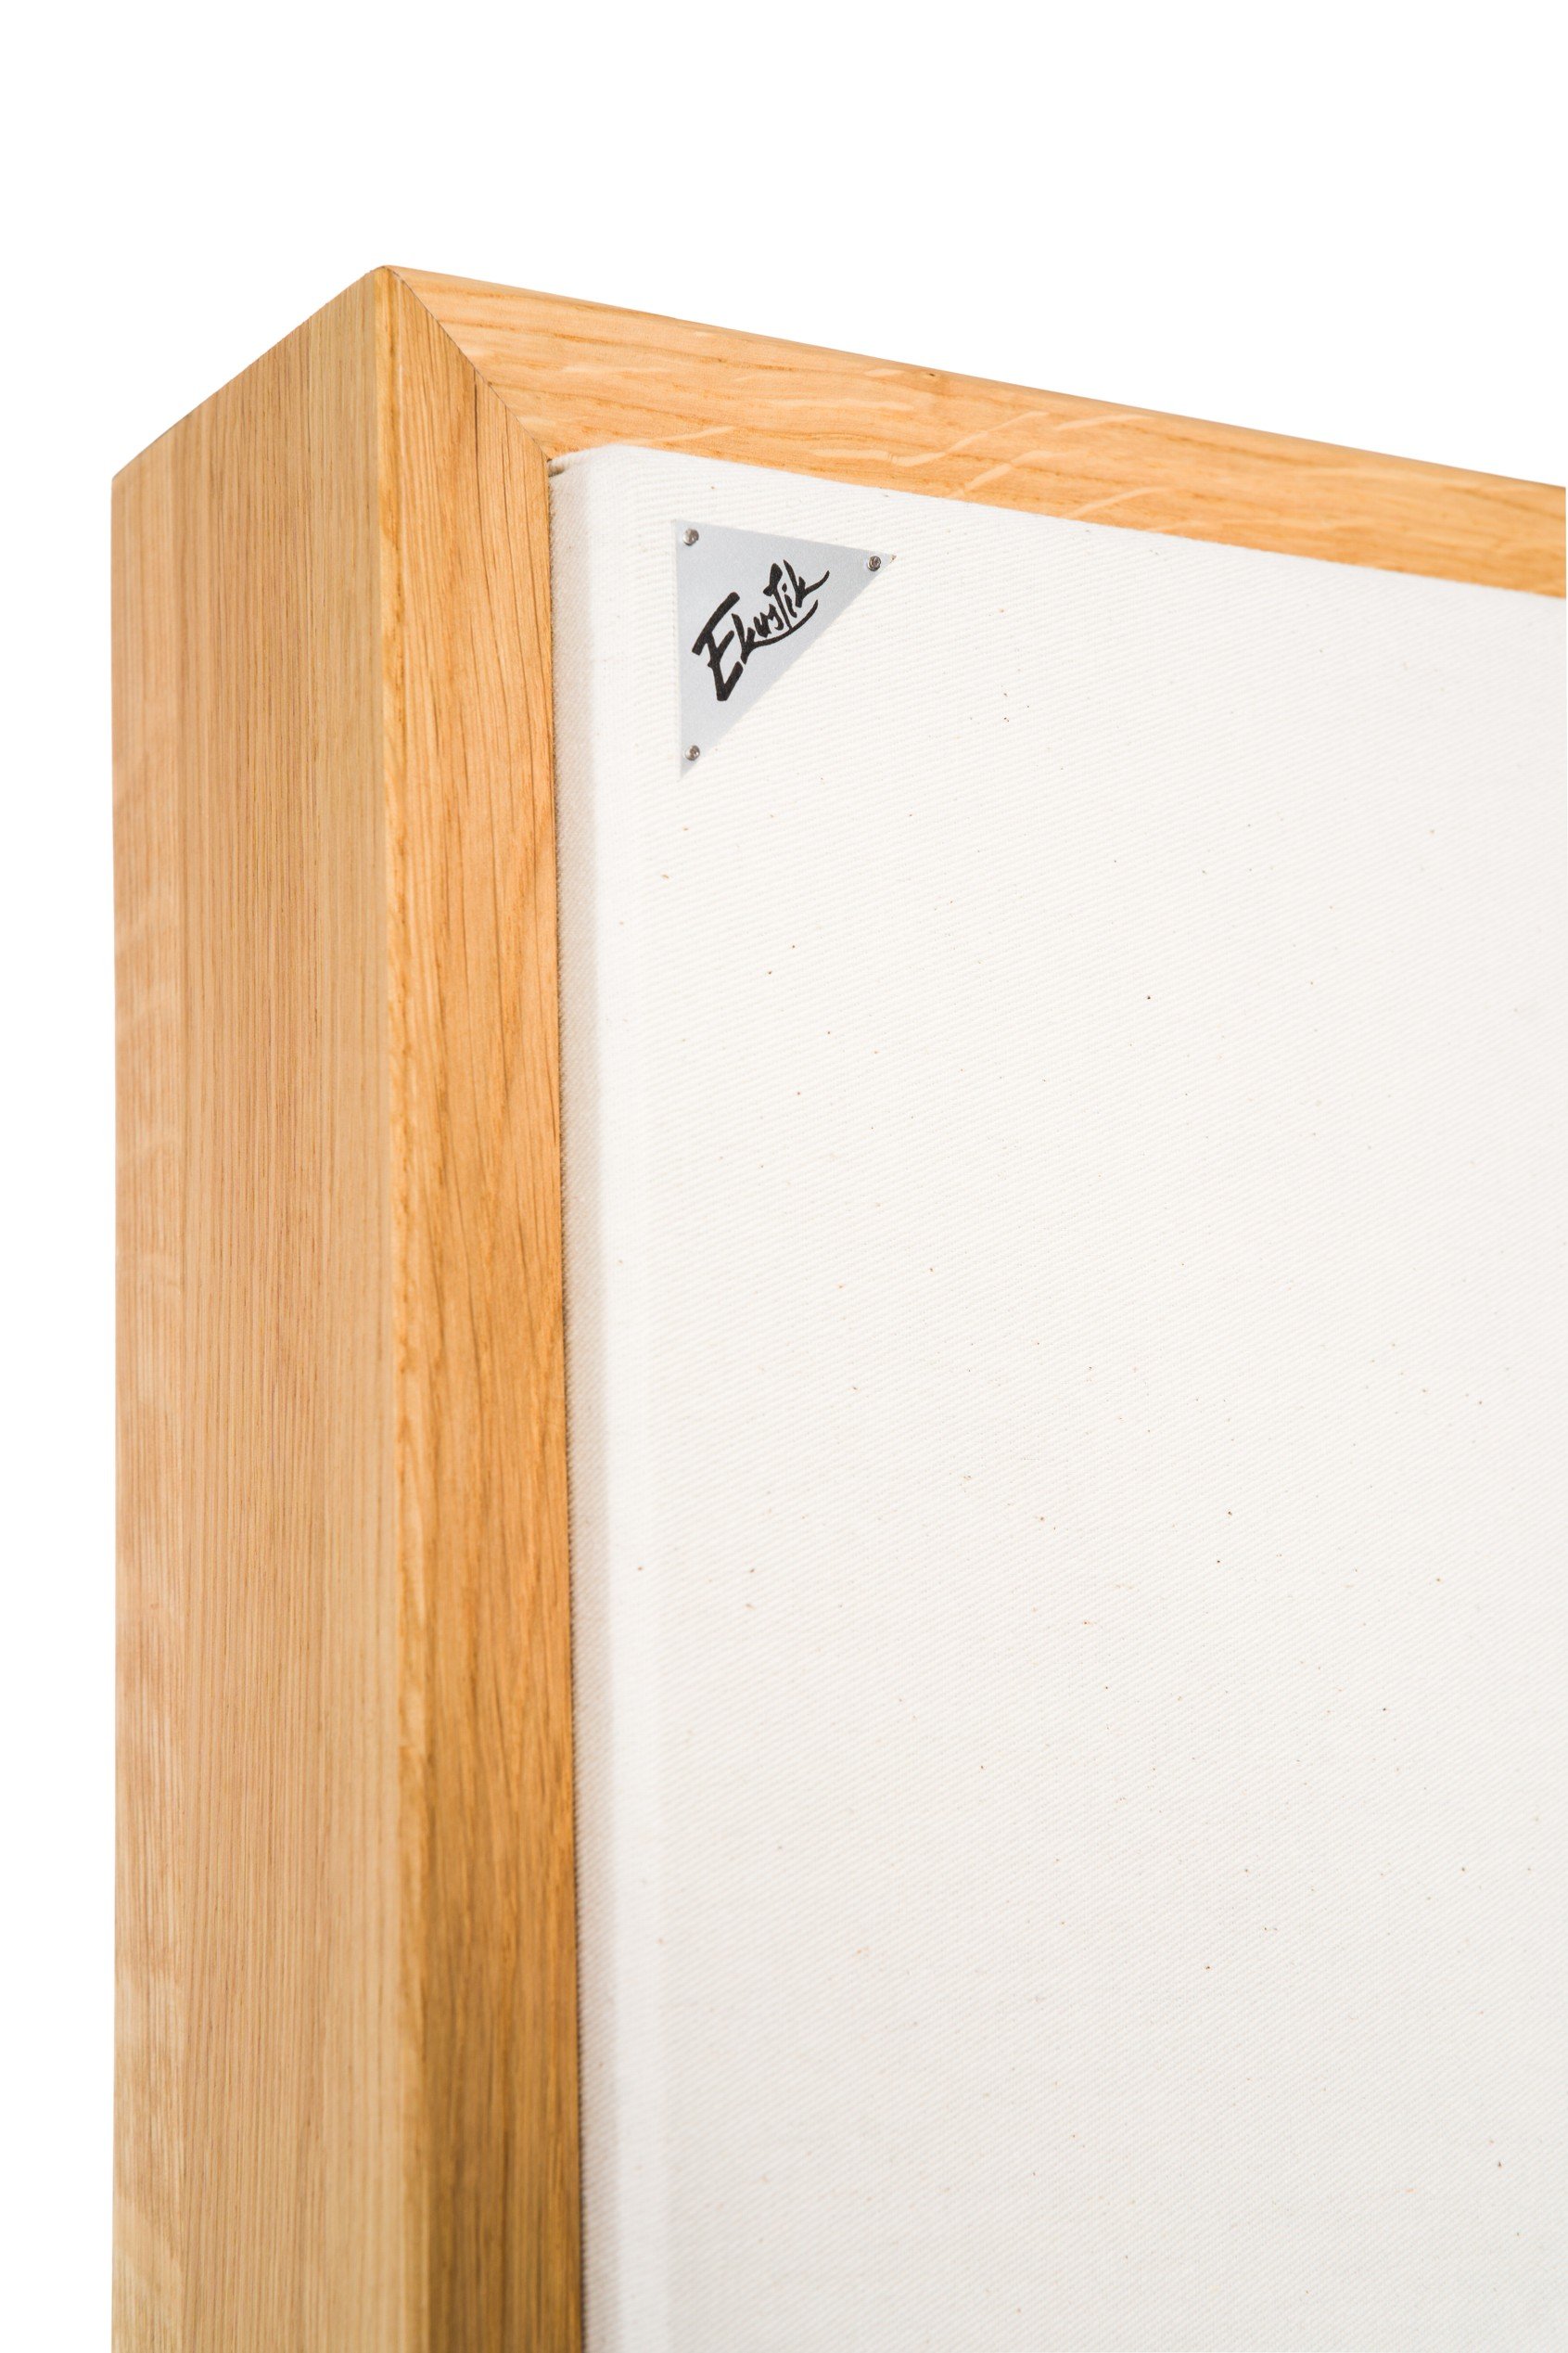

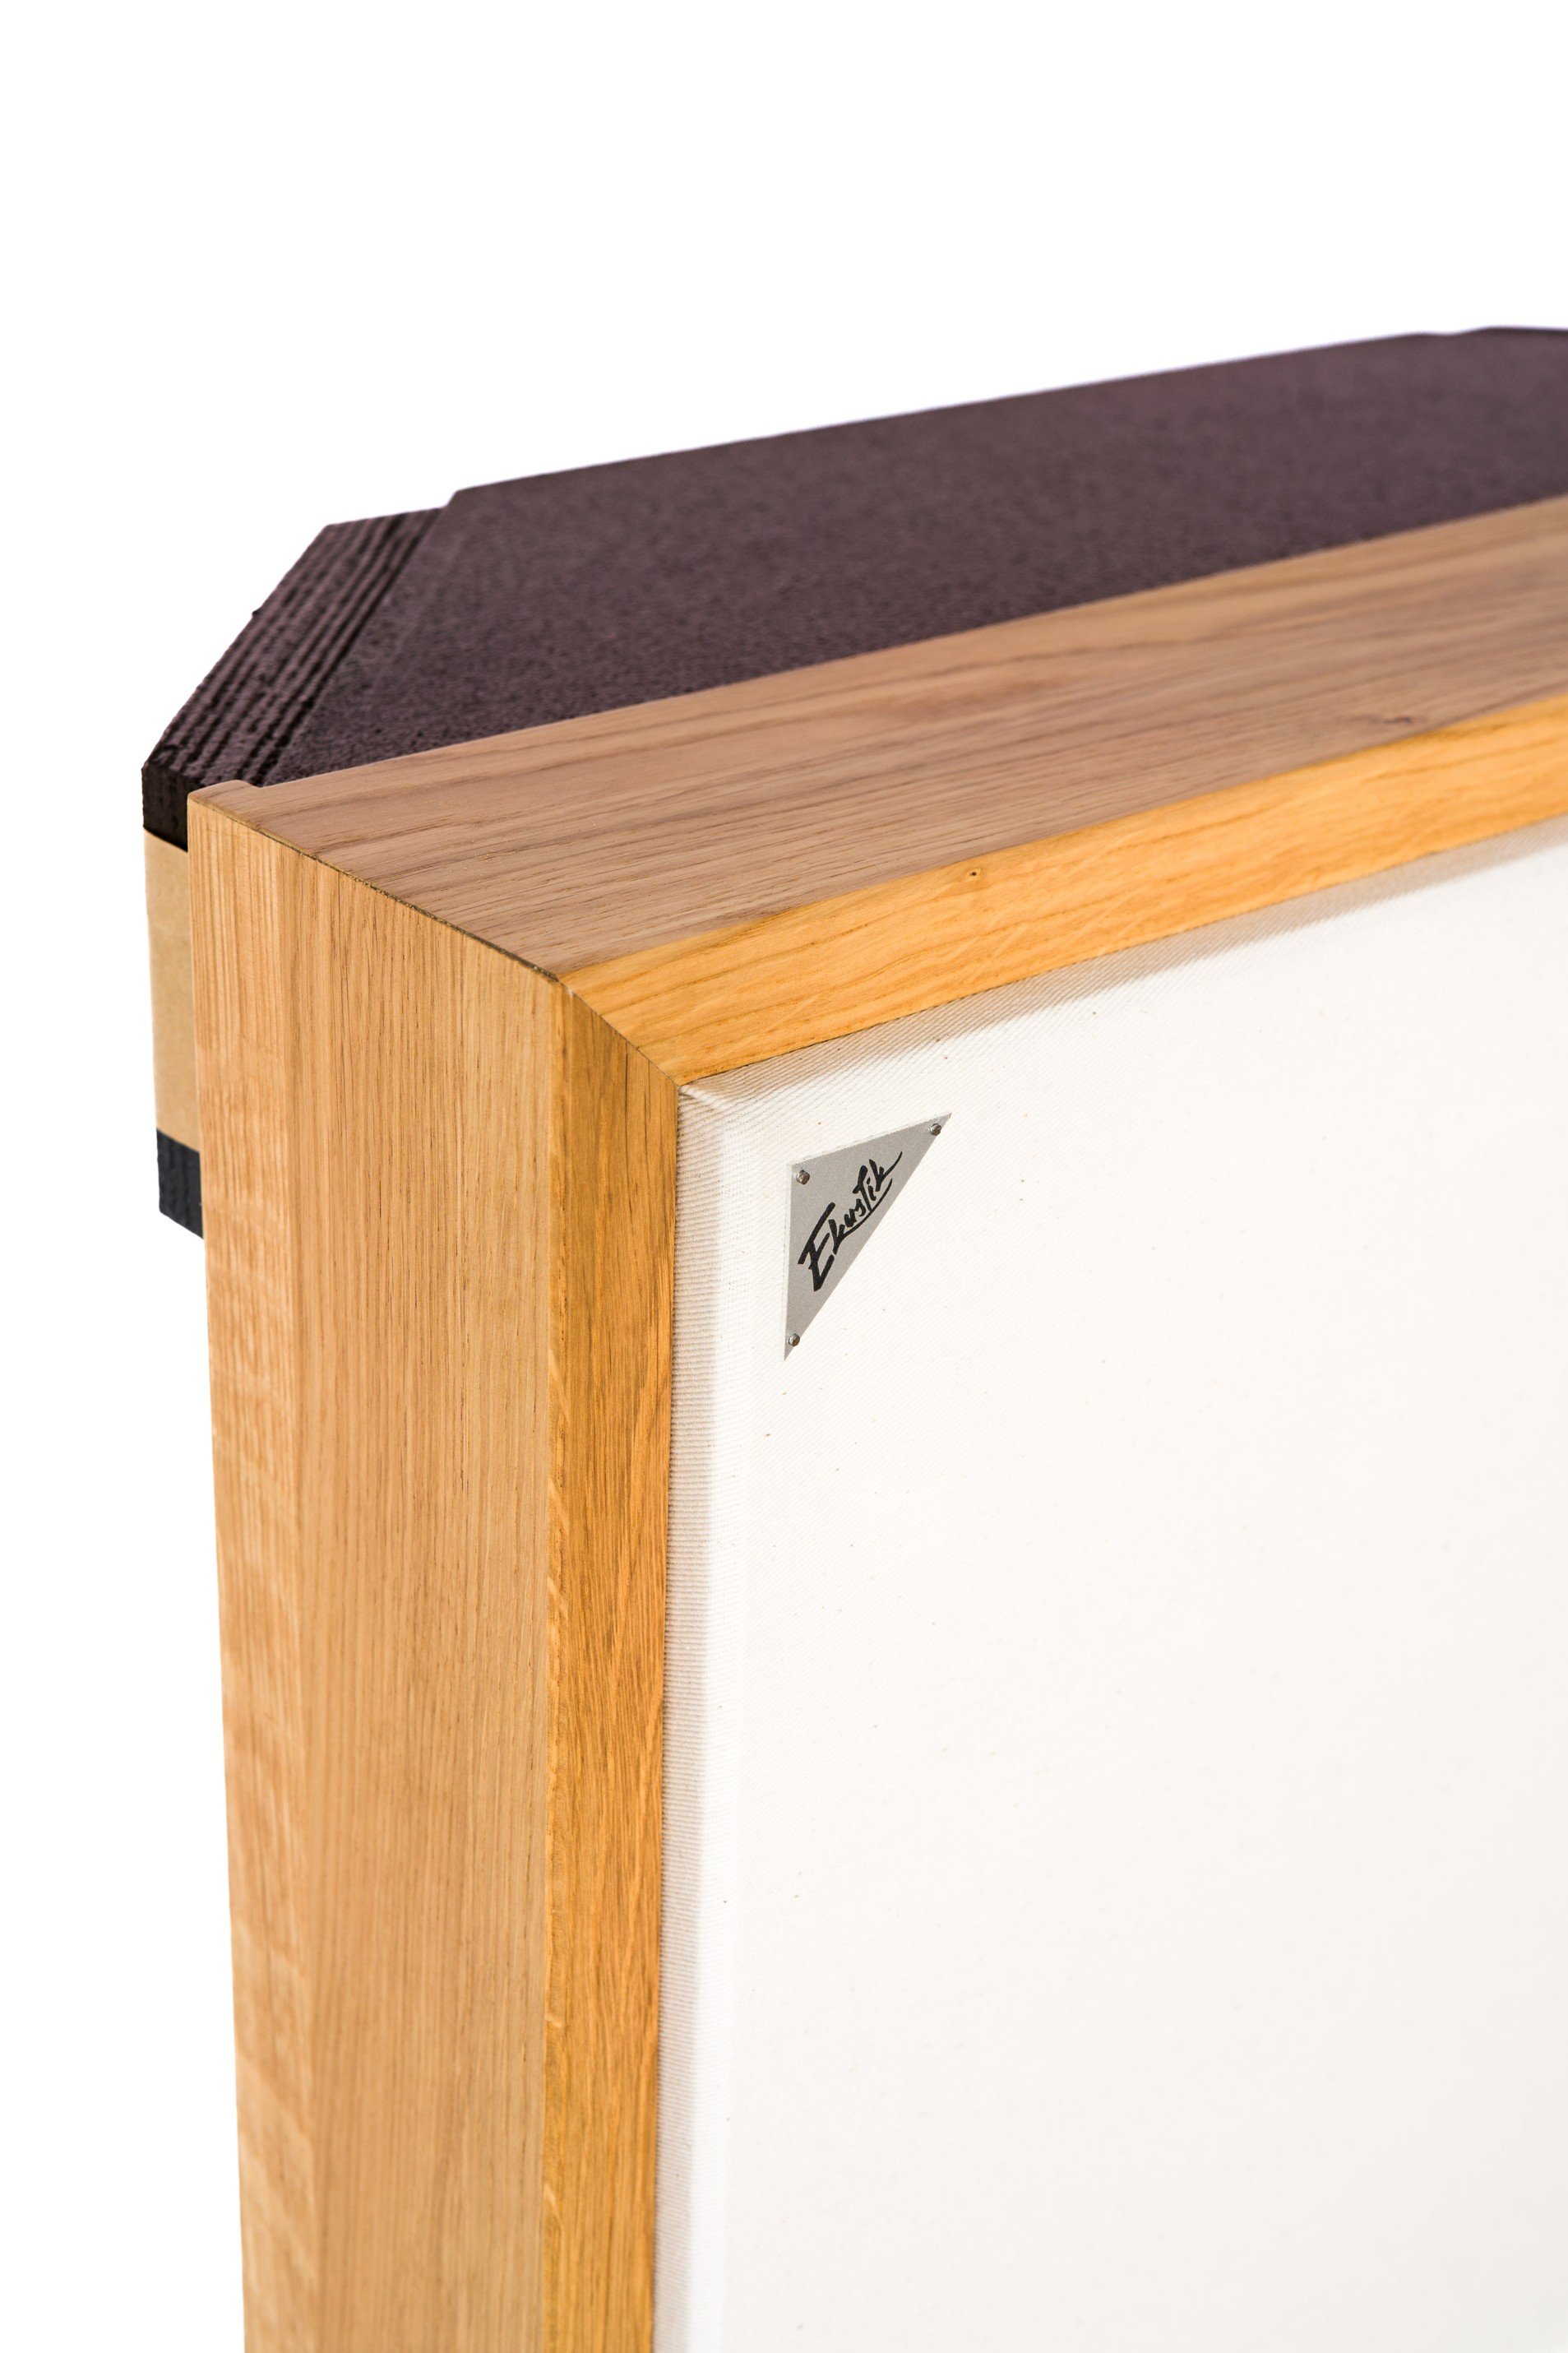
Improve your space instantly with Woody Queen acoustic panels.
Handcrafted from only sustainable, safe materials, they are the professional way to manage sound. They effectively reduce noise, create a clearer environment, and look beautiful doing it.
Key features:
Instant improvement of room acoustics and noise reduction
Absorption effectiveness already from 100 Hz
Acoustic material from recycled PET (OEKO-TEX®)
No mineral wool used - doesn’t release micro-particles into air
Luxury patented wooden design
The first step is always to get rid of the sound reflections from the sidewalls and ceiling. You want to create a sweet spot at your listening position, where only the direct sound from your speakers will be heard.
Place absorption panels on the sidewalls and ceiling between the speakers and the listening position.
The more absorption you use, the better.
If you have carpet, place it underneath your listening position. It can help with higher frequencies.
Treat the low frequency
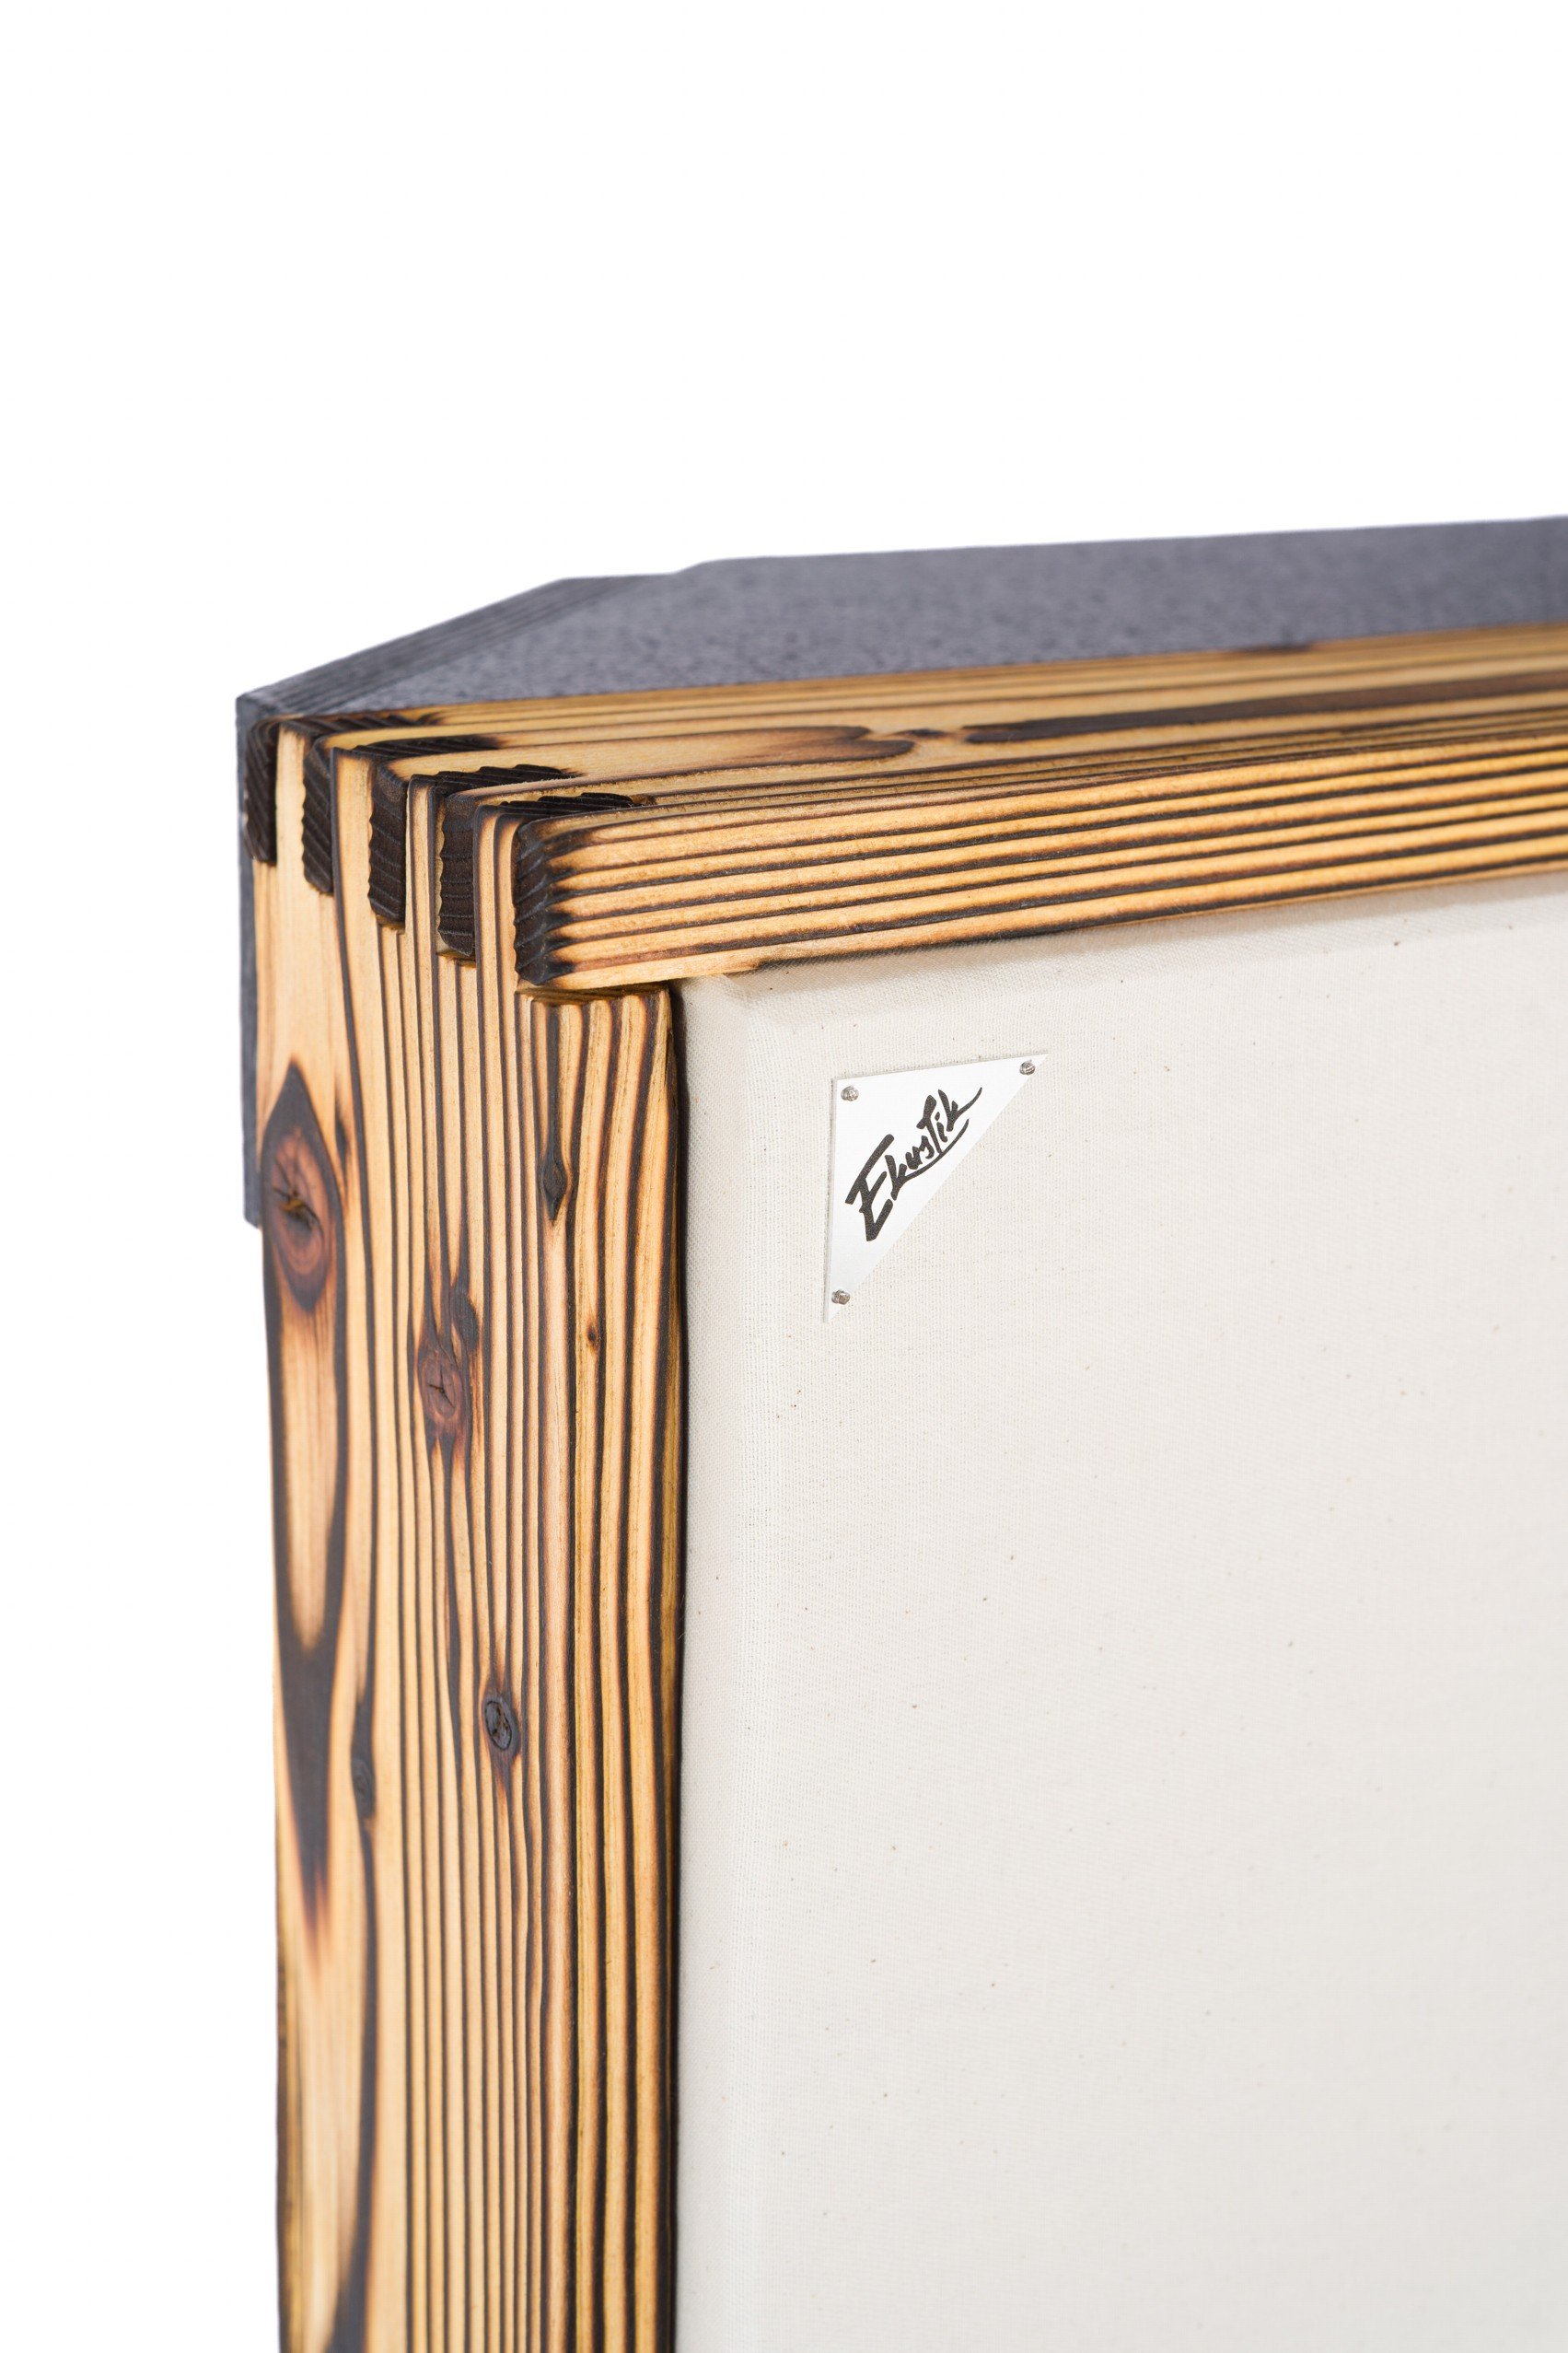

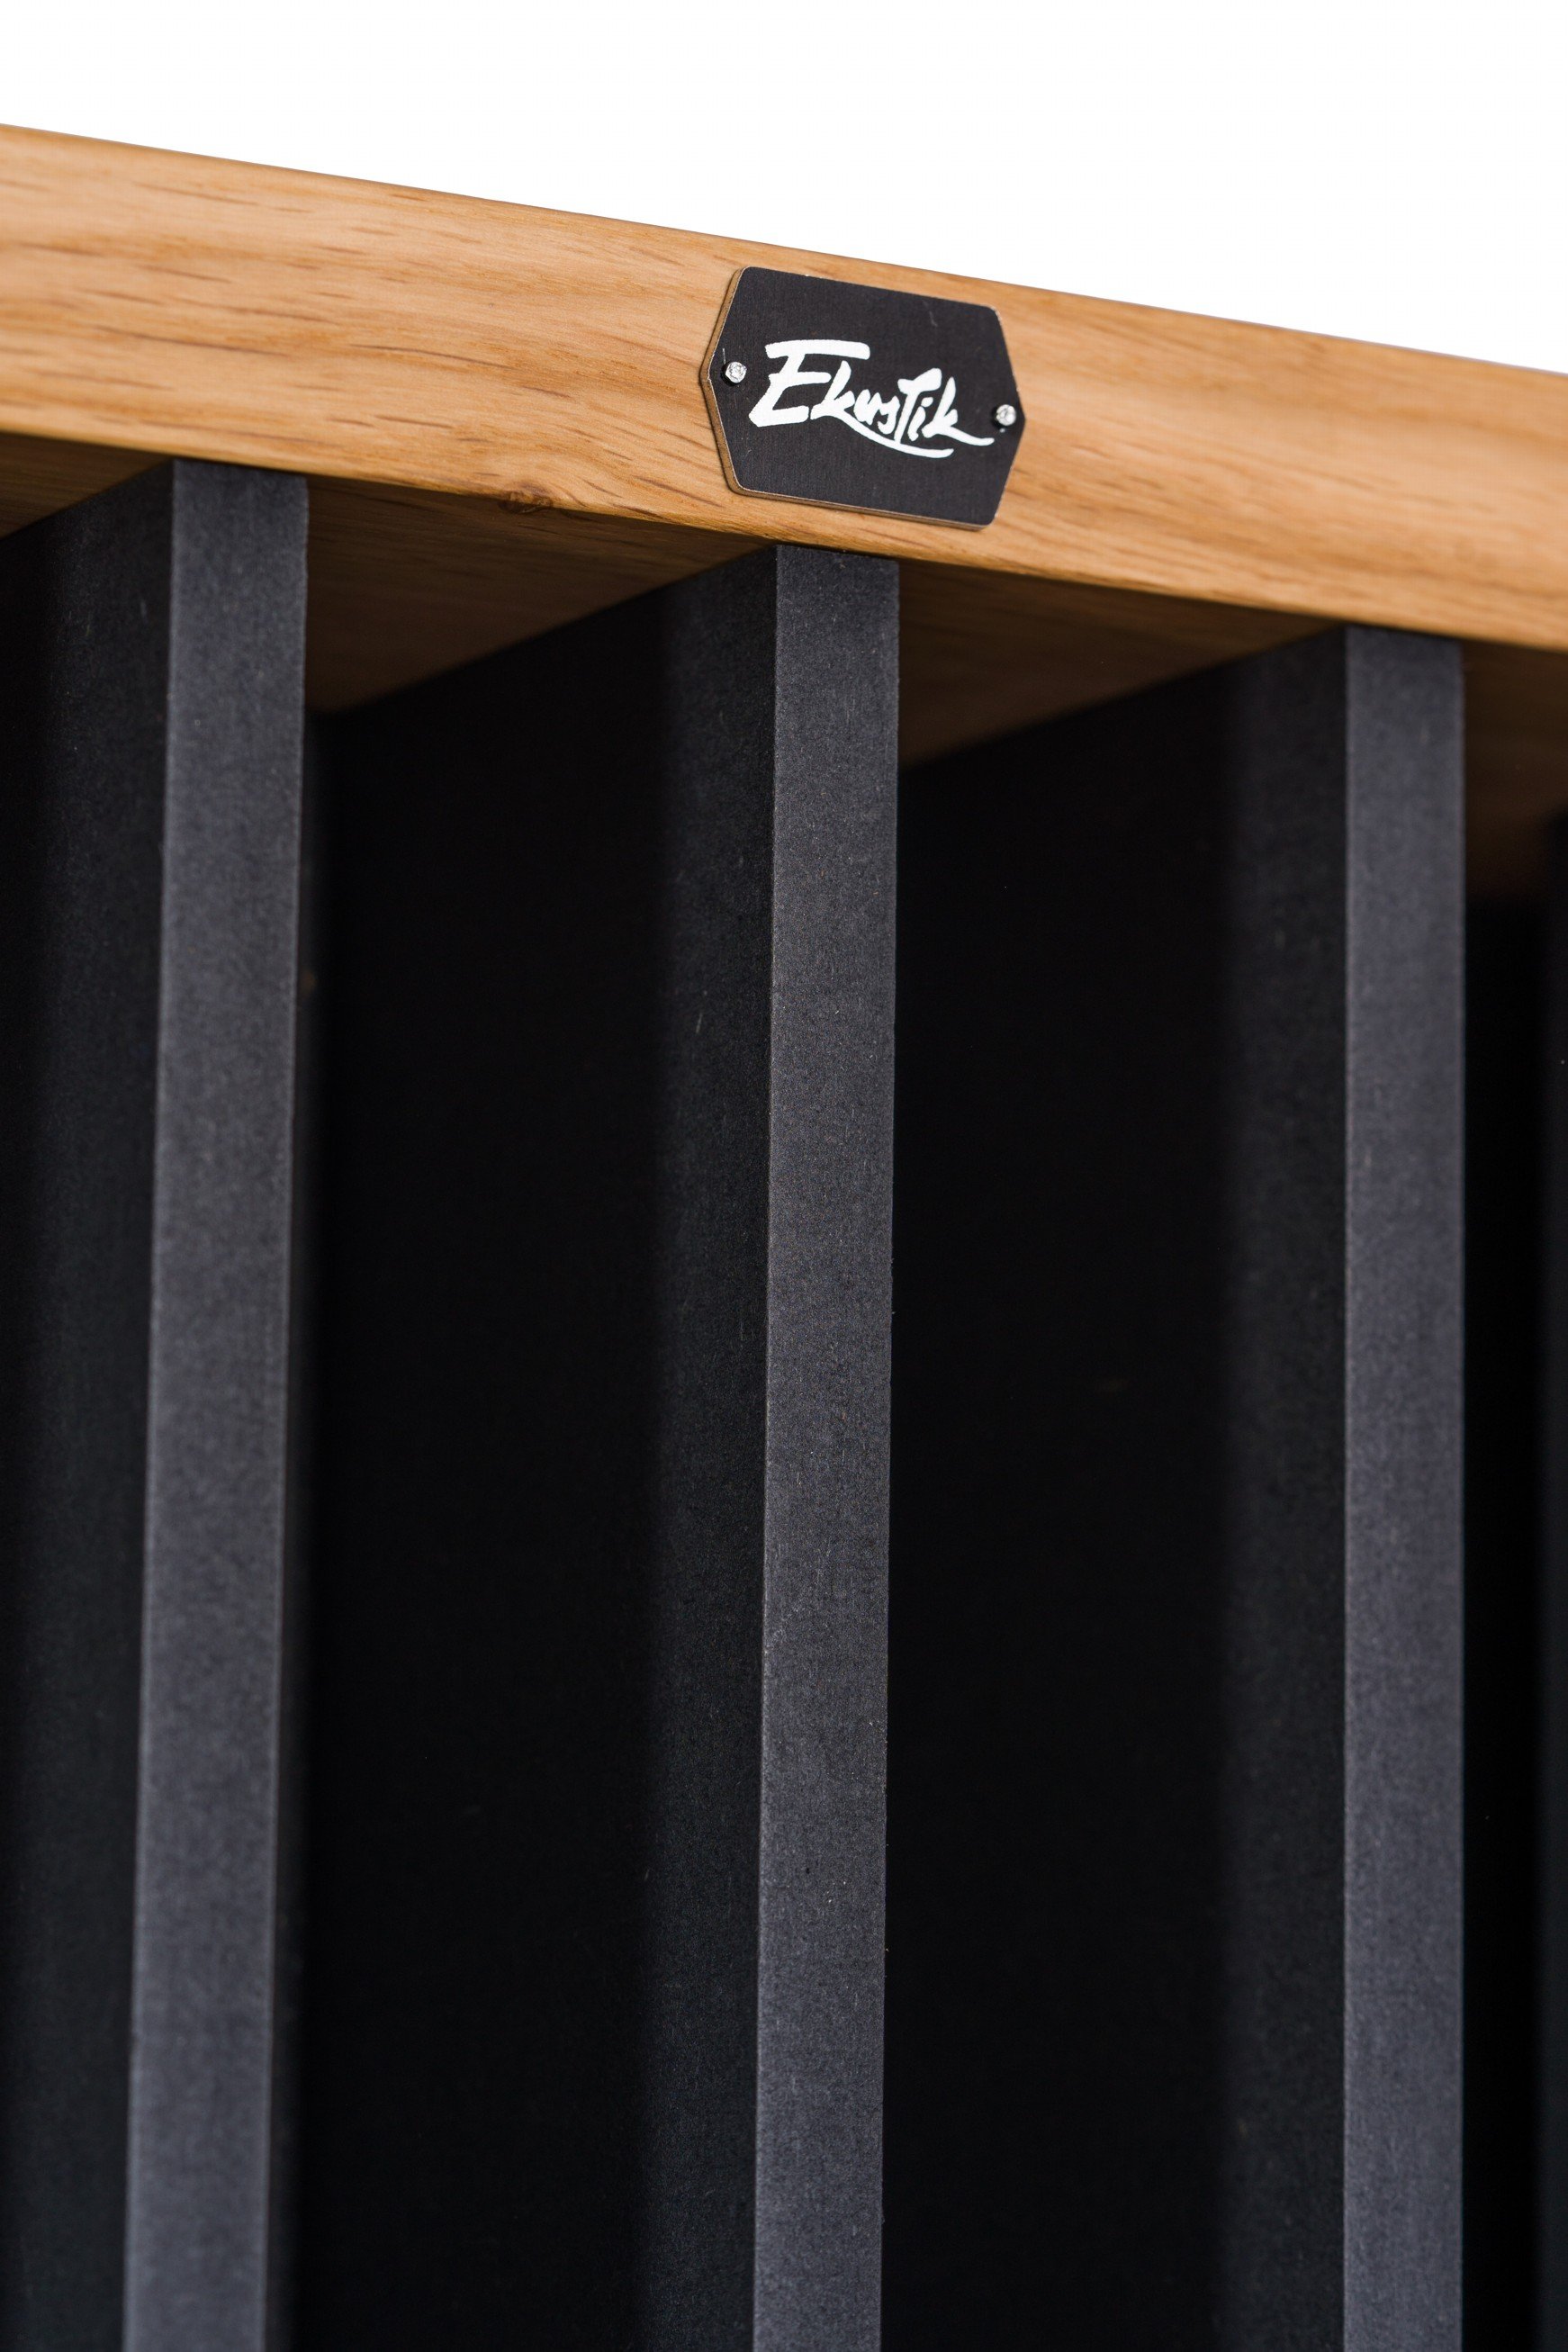
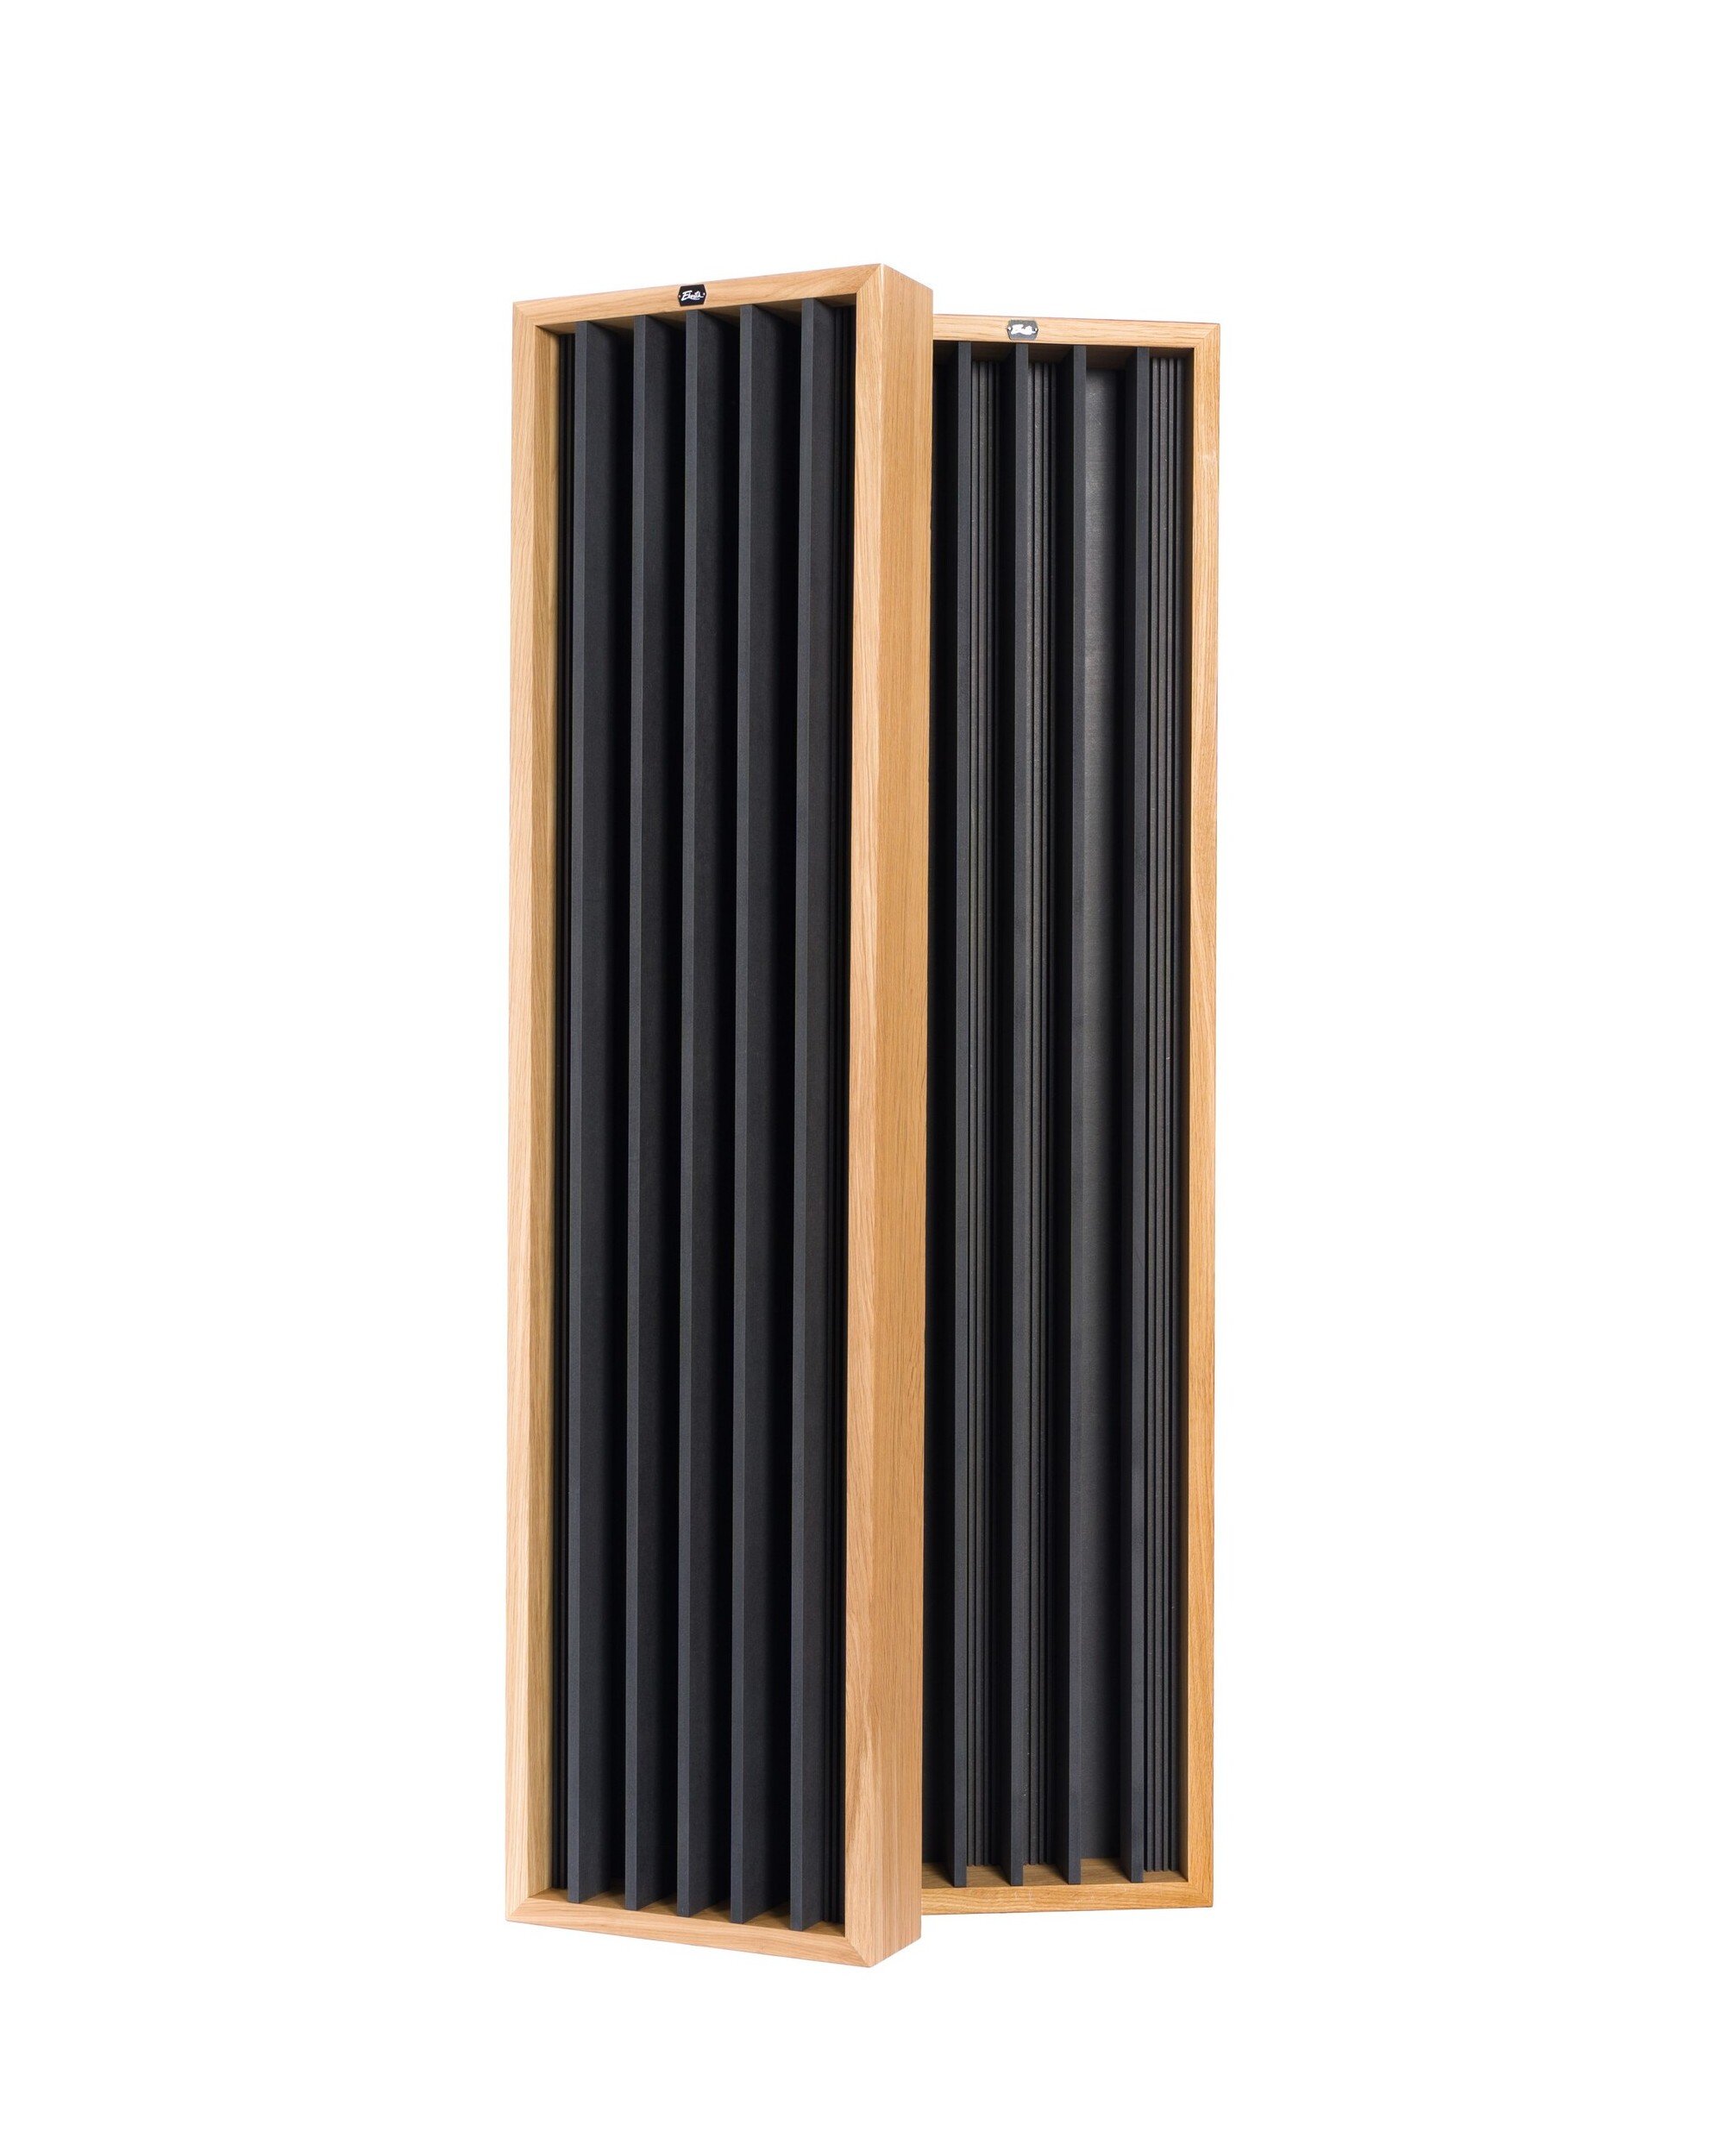
Featuring advanced membrane technology, the handcrafted Woody Wavy is an elegant acoustic absorber engineered specifically to tame your room’s most challenging low frequencies. Its sophisticated wooden finish adds a touch of modern glamour to any studio or living space.
Key features:
Instantly absorbs low frequencies, eliminating boominess from your sound
Membrane technology is highly effective precisely between 40 Hz and 80 Hz
Built without mineral wool, ensuring your air remains free of micro-particles
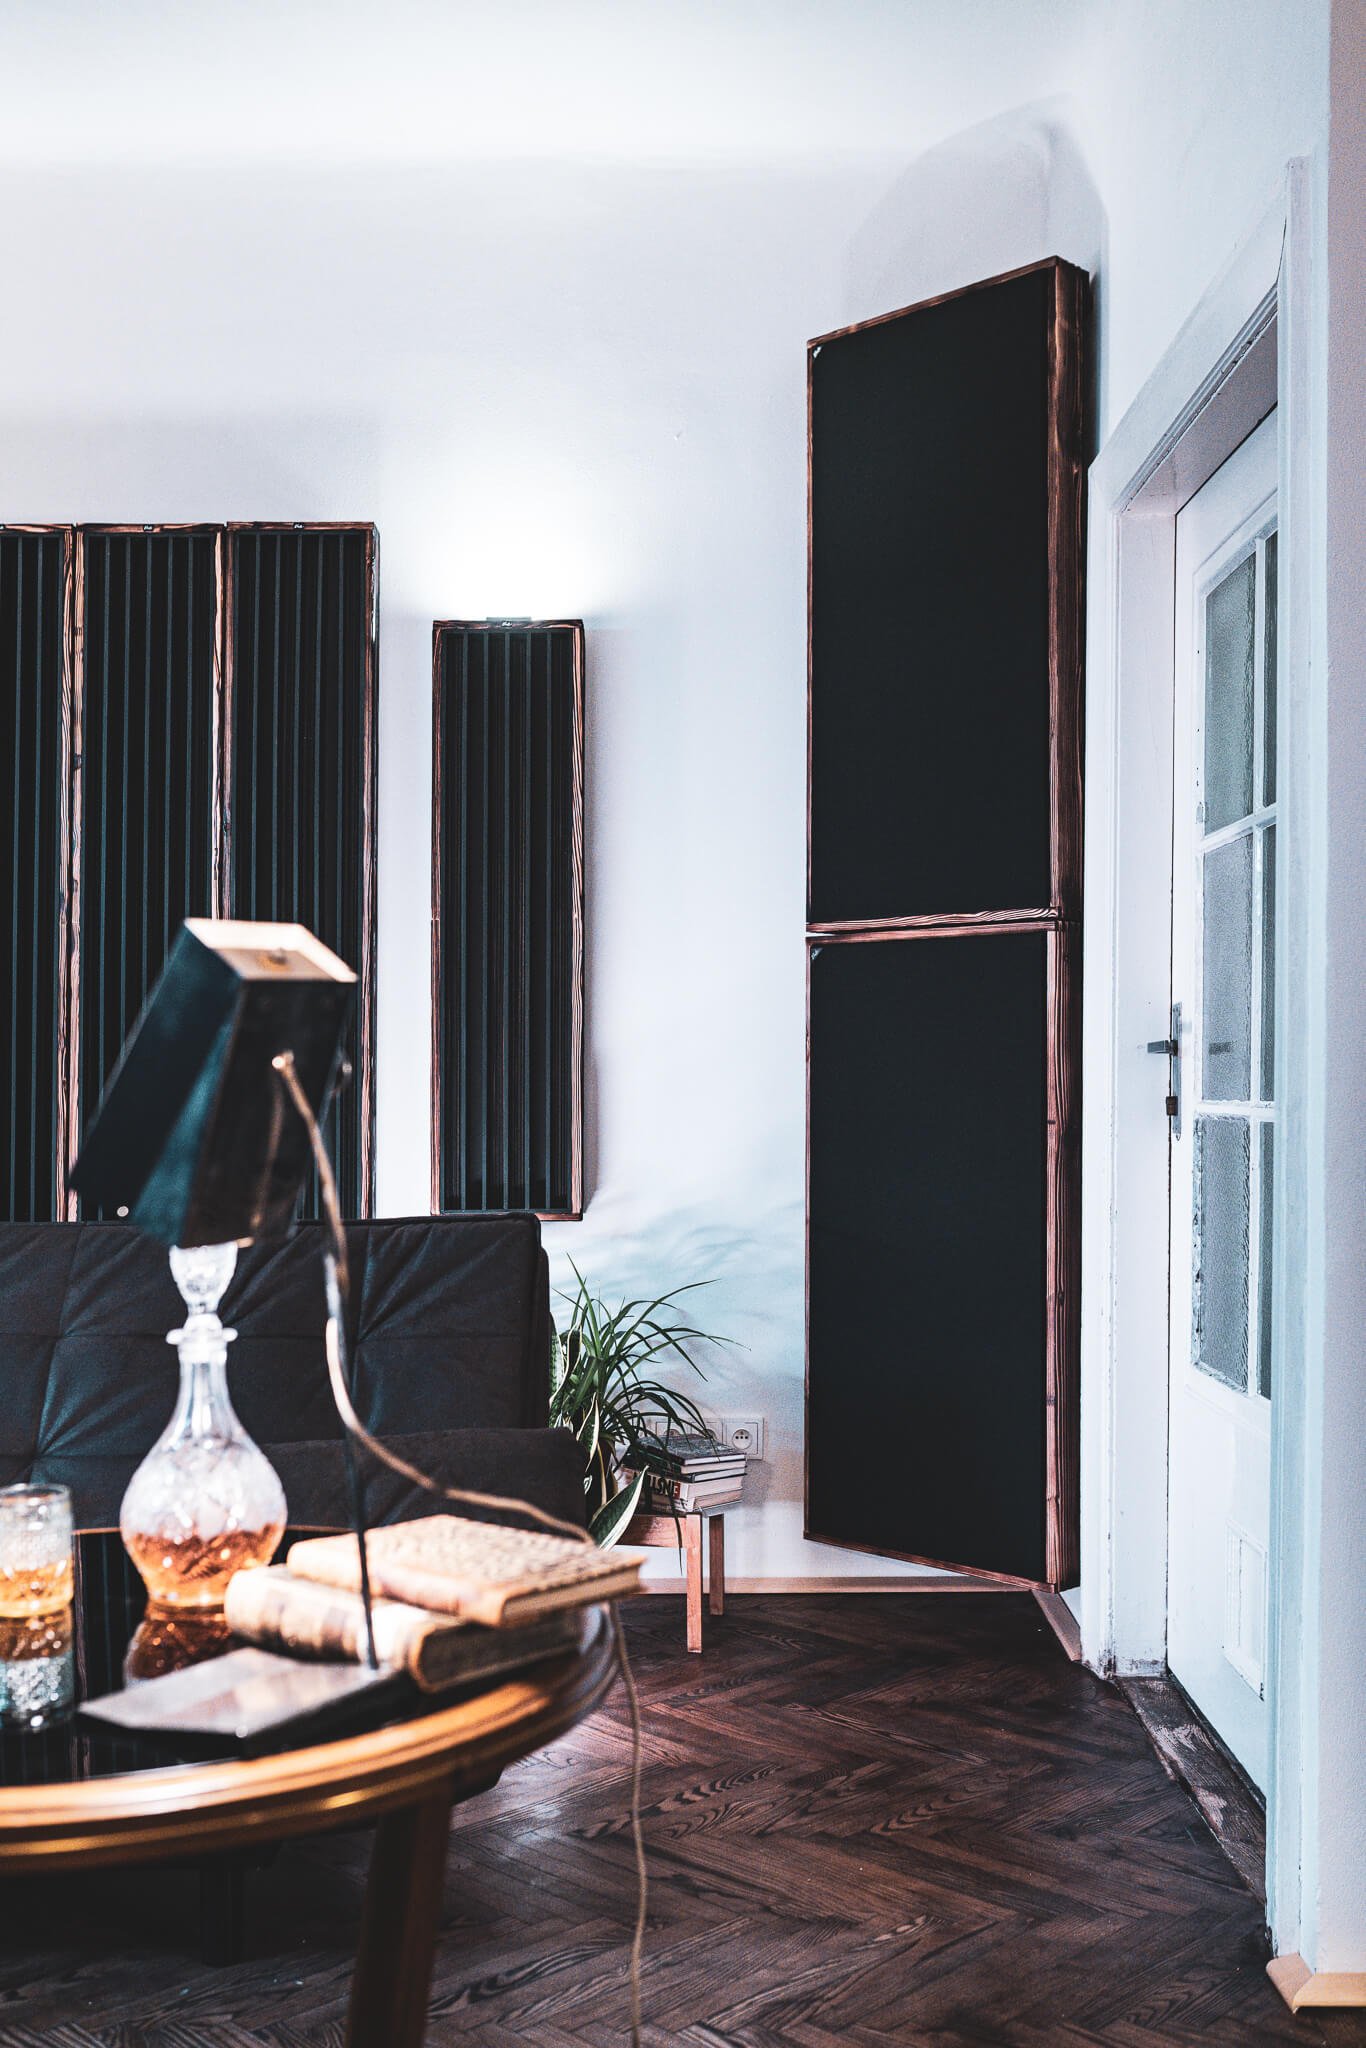
Designed specifically for corner placement (bass trap), which is crucial for controlling standing waves
Features a luxurious, durable, and uniquely professional wooden finish
Save up to 20% when purchasing multiple units
In almost every room we treat, we have to focus on the low frequencies. Since the low-frequency sound waves are so long and can’t really travel in the room, they cause ‘room modes’ (standing waves of these low frequencies get very attenuated or amplified). This means that some low-frequencies can get very loud or very silent, and you don’t want that. You want an even frequency response.
The biggest effect on the low frequencies has the dimensions of your room. But if we can’t really build a new room with ideal ratios, bass absorbers placed in the corners of the room are the best possible solution. Room modes are strongest in the corners, so we want to place the treatment here.
Place low-frequency absorbers into all possible corners and start with corners closer to your listening position. The more the better.
If some of the corners are not available, don’t worry. Place more into the corner where it is possible.


2. Pro treatment
Did you know that pro studios have usually more than 50 % of the wall area covered either by absorption or diffusion? This is because you want to keep the reverberation time of the room below 0.5 seconds. The reverberation time tells you how long does it take for the sound in the room to decay and if you have too much reverb, it makes the sound too blurry. The best studios in the world have reverb around 0.3 seconds, which really takes a lot of absorption!
Gradually add more absorption to sidewalls, ceiling, and front wall to widen the sweetspot and shorten the reverberation time.
An air gap behind the absorptive panel helps. Sound can get absorbed even from the back of the panel so if you introduce the air gap behind some of the panels, you will increase their efficiency. Just a few centimeters help.
More bass absorption in corners will help with low-frequencies.


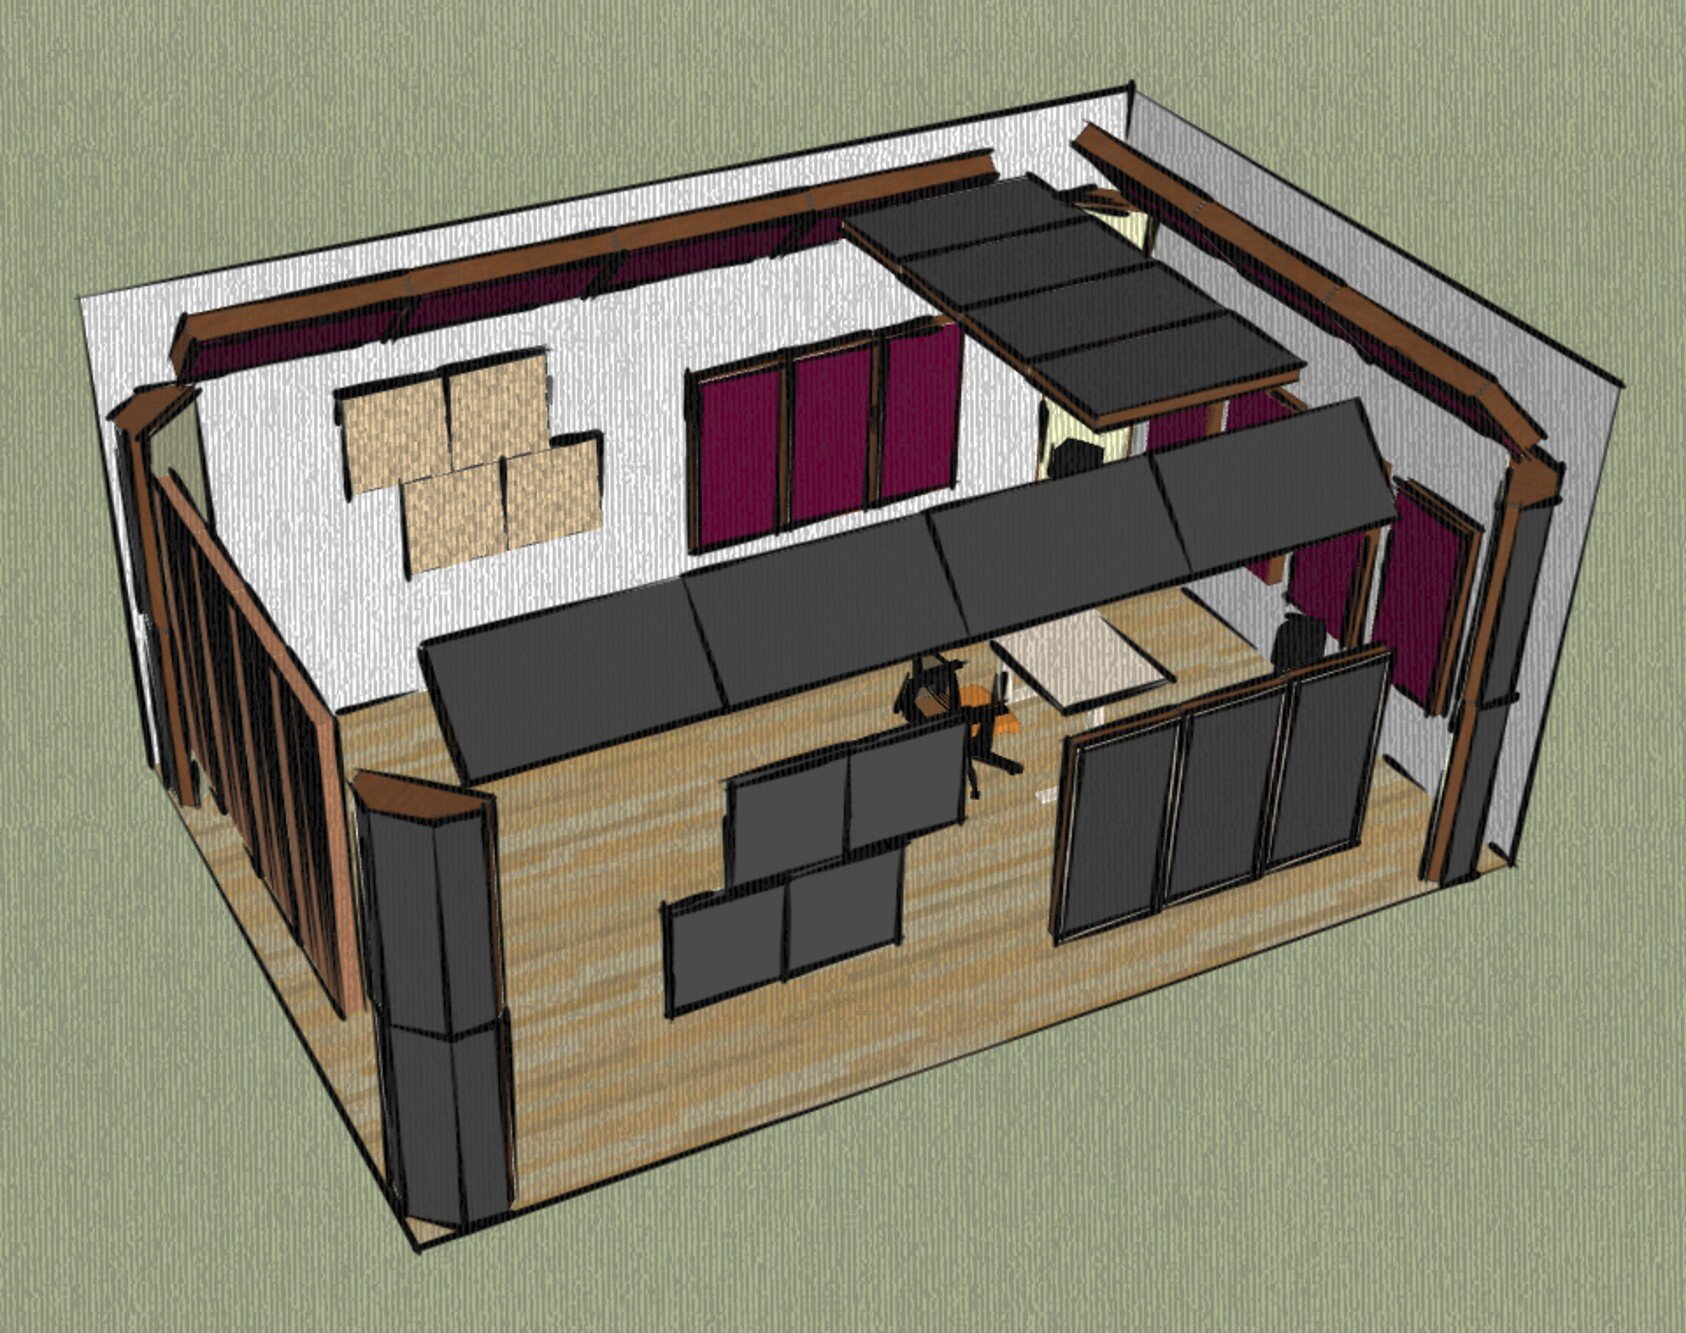
3. Full treatment
Get to this level and your sound will be like in a pro studio built just for that. Acoustic treatment is following one of the most used concepts in studio acoustics: Live End Dead End (LEDE).
The front part of the room is the Dead End, where you eliminate all the wall reflections by placing absorbers on the front wall, side walls, and ceiling. This will ensure you get the best out of your speakers, without any reflections interfering with the direct sound.
The back of the room is the Live End, thanks to which you can elevate the room sound to even higher quality. The live end uses diffusion to evenly distribute the sound waves bouncing into the back wall and keeps the sound energy in the room. By having a diffusing field in the back, you will experience sound like in world-class studios.

Premium Quadratic Residue Diffuser (QRD), meticulously engineered for high-end audio and designed to make your space stand out. It offers superior acoustic efficiency while maintaining the leanest profile on the market.
Key features:
Instantly enhances the listening experience by scattering sound and eliminating echoes
Delivers the highest effectiveness starting from 350 Hz, covering crucial mid-to-high frequencies
Features a unique fractal design that extends efficiency well past 4 kHz
At only 10 cm deep, it is the thinnest QRD diffuser available
Handcrafted with a luxurious, patented wooden design
Save 10% when purchasing multiple units
Continue with absorption in the whole front part of the room. Make it the dead end.
Diffusion is placed in the back. QRD diffusion works the best to achieve an evenly distributed sound field. Make it the live end.
Treat all walls of your room.
Do not leave bare walls to prevent flutter echoes (echoes appearing between untreated walls).
Various rugged surfaces and diffusers can be used on the sidewalls and ceiling to prevent flutter echoes.
Better having absorption than nothing. If you don’t have the budget for QRD diffusion in the back, place a few absorbing panels there.